Purpose:
This tutorial will show you how to connect a FileZilla client to an FTPS (FTP over SSL) FileZilla host.
FileZilla can be obtained from their website at http://filezilla.sourceforge.net/
Prerequisites:
- Have a user account with SFTP access to the server you are connecting to
- VPN if necessary
Process:
This document will show you how to connect to remote servers for SFTP access
Procedure:
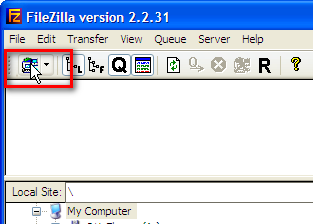
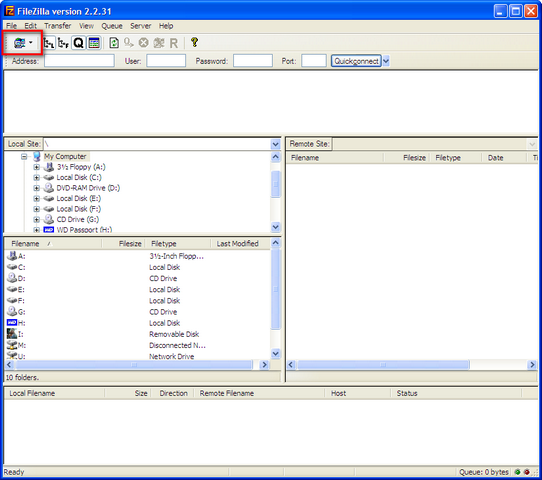
Step 1: Open the Sites Manager
Start up FileZilla. After the program is running, click on the "Site Manager" button.
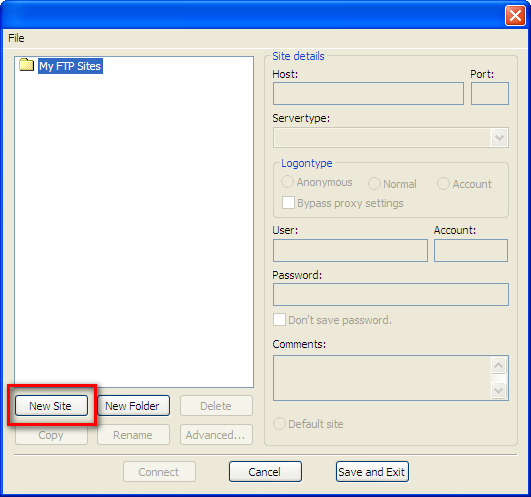
Step 2: Add a new site
In the Site Manager window, click the "New Site" button.
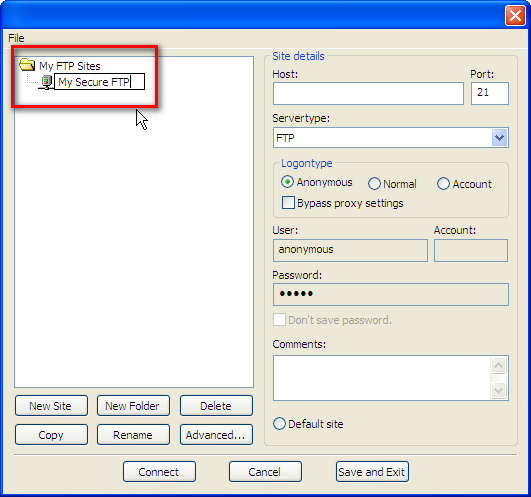
Step 3: Give your new site a name
The new site will appear in the left-hand side of the window, ready for you to type in a new name for it. You can call it anything you like. For this tutorial I will call the site "My Secure FTP".
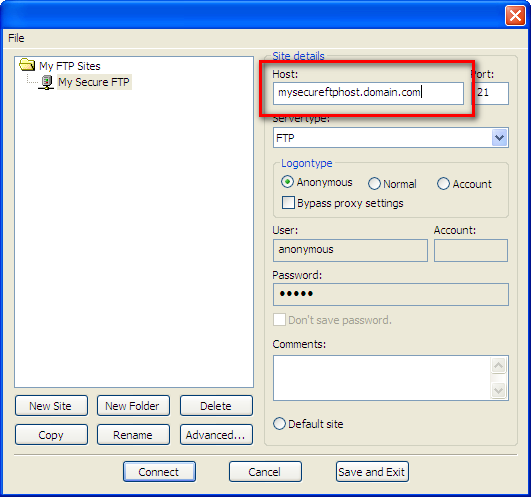
Step 4: Tell FileZilla the host to connect to
In the "Site details" area, in the "Host" text box, put the name of the host that you will be connecting to. We suggest using a Fully Qualified Domain Name (FQDN) instead of an IP address.
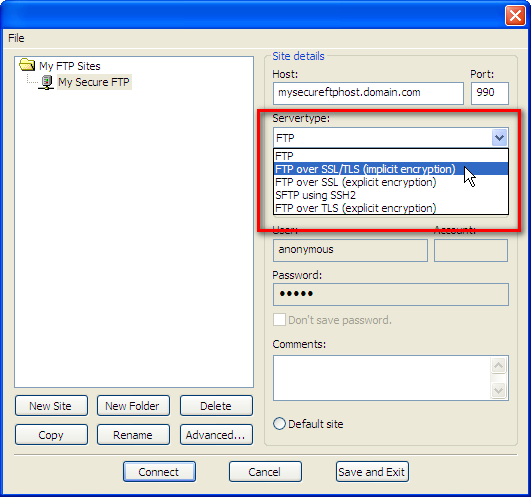
Step 5: Tell FileZilla the port to connect to
In the "Site details" area, in the "Port" text box, put the number of the port that you are connecting to on the host. In most cases this will be 990, the default port for FTPS, however, you may want to check with us or your administrator.

Step 6: Tell FileZilla what type of connection we are using
In the "Site details" area, use the "Server Type" drop down menu to select "FTP over SSL/TLS (implicit encryption).
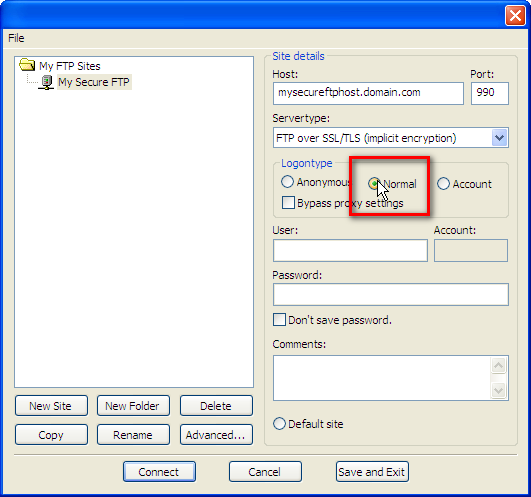
Step 7: Change the logon type
In the "Logontype" area, select the "Normal" radio button. The "User" and "Password" text boxes should become available.
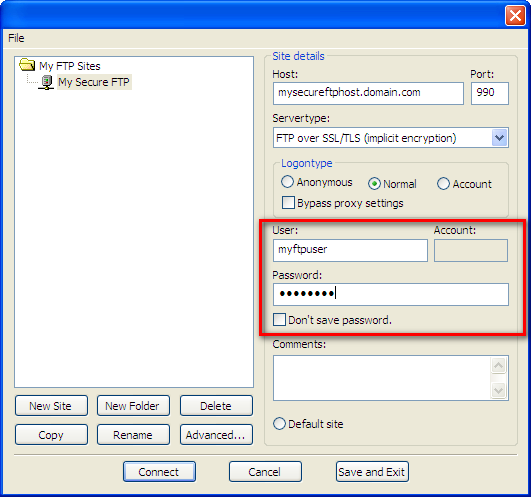
Step 8: Enter your login information
Enter the login information that was given to you by us or your administrator in the "User" and "Password" text boxes.
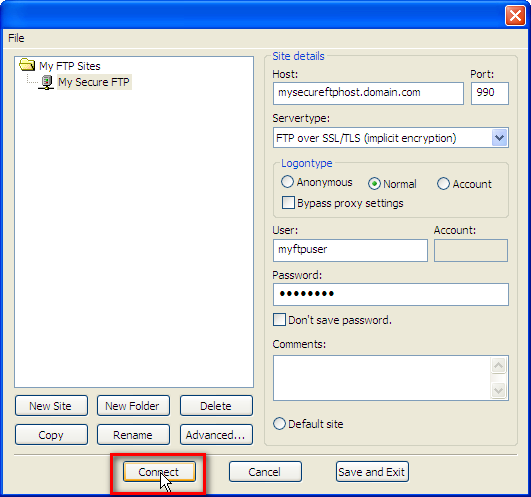
Step 9: Connect
FileZilla now has the information that it needs to connect. Click on the connect button on the lower left-hand side of the Site manager window.
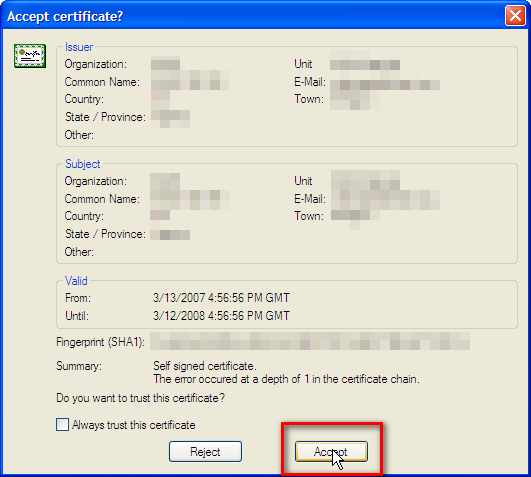
Step 10: Accept the certificate
If your server is using a self generated certificate, you will be prompted with a dialog below. Because we are using the SSL certificate to encrypt data (not to verify the identity of the host), you can accept the certificate. You may want to tick the check box that says "Always trust this certificate" to prevent this dialog from appearing for future connections.
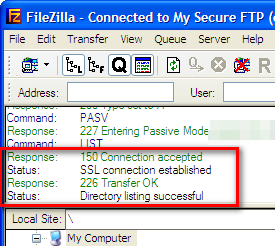
Step 11: Now you are connected!
After connecting, you should see something similar in the logging window of FileZilla. That's it! You are now using a secure FTP connection to transfer your files. If you are having problems connecting, you may want to see the notes at the bottom of this page.

Notes
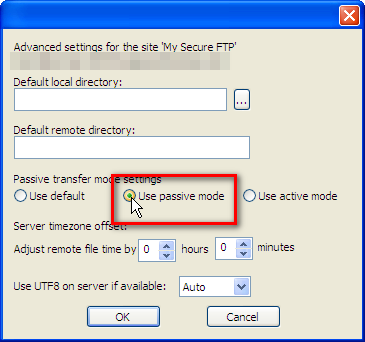
If you are still having problems connecting, you may need to tell FileZilla to use a "Passive" connection. To do this, first open the Site Manager as you did in step 1
Select the site that you created in the first part of the tutorial, and click on the "Advanced" button.

Under "Passive transfer mode settings" select the "Use passive mode" radio button.
Click "OK".
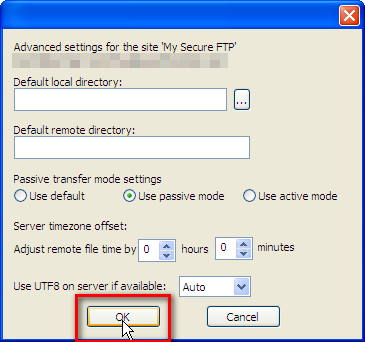
Click the "Connect" button.
If you are still unable to connect, please contact support.